Updated Information As Of February 5th, 2018
When logging into GigaCenters there is a new password for the username support. It is keepOut-72863!!
Use this when logging into devices directly.
Logging In
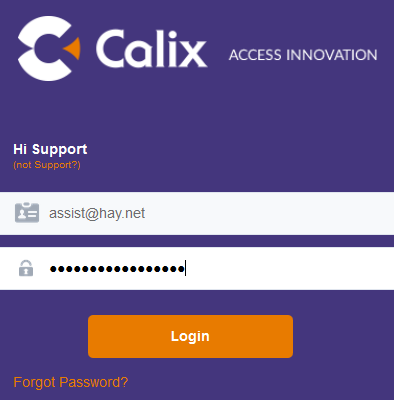
Visit the website https://compass.calix.com and login with the support account credentials which are listed below.
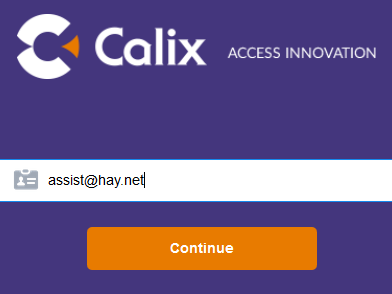
- Username: assist@hay.net
- Password: #4Support@ll$tars1
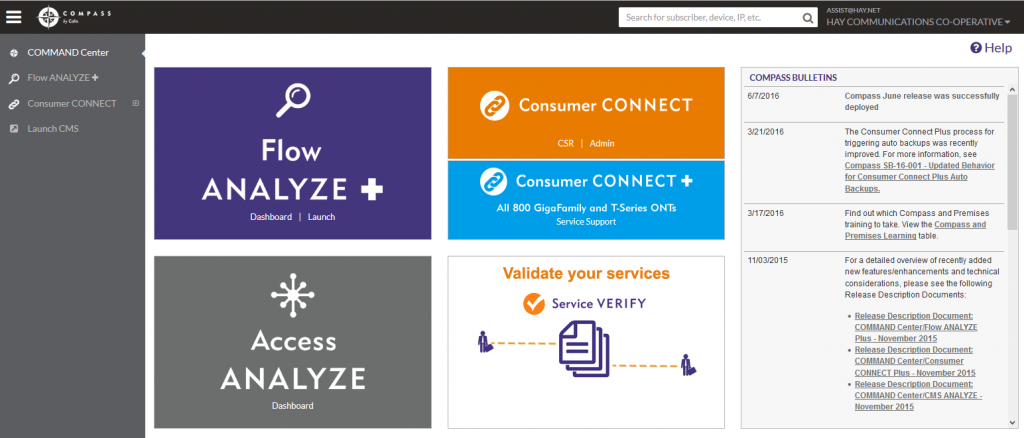
Once logged in you will be brought to the Command Center homepage, shown below.
There is a search box at the top right, menu toggle at the top left, main menu on the left. There is also a few shortcuts in the main window.
Note: Sometimes after logging in it redirects you back to force.calix.com. Simply go back to compass.calix.com.
Look Up Calix 844E Router or 854G ONT
The most common ways to search devices is by FSAN or IP address.
Find the IP Address in NOMS. FSAN can be found in Ivue in some cases.
Begin by entering your search at the top right and press enter to get to the results page.

Once you hit enter one or more results will be displayed with your search criteria highlighted in yellow.

![]() This chain link icon is used to open up Consumer Connect+ where device configs, such as WiFi, can be set
This chain link icon is used to open up Consumer Connect+ where device configs, such as WiFi, can be set
![]() This magnifying glass icon is used to bring up Flow Analyzer which shows some traffic details
This magnifying glass icon is used to bring up Flow Analyzer which shows some traffic details
Consumer Connect
Click the chain link icon to open the device in Consumer Connect. You’ll be brought to the Device Summary screen.
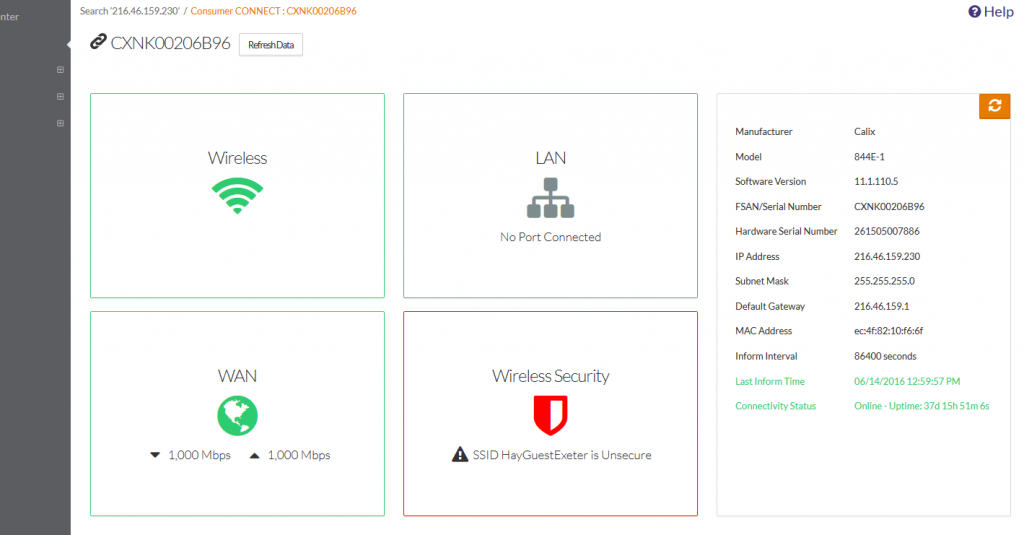
From the Device Summary screen, shown below, we can see that the device is online noted by the green Connectivity Status. It would be red if it was offline. It shows uptime, WAN IP, FSAN and other info.
The four main squares shows the status of the different services / ports and are shortcuts to get to more configuration options.
As we can see in this image below Wireless is active but Wireless Security is off.
The Refresh Data button can be used at any point to refresh the information without re-loading the entire page.
Show or Change WiFi Configuration
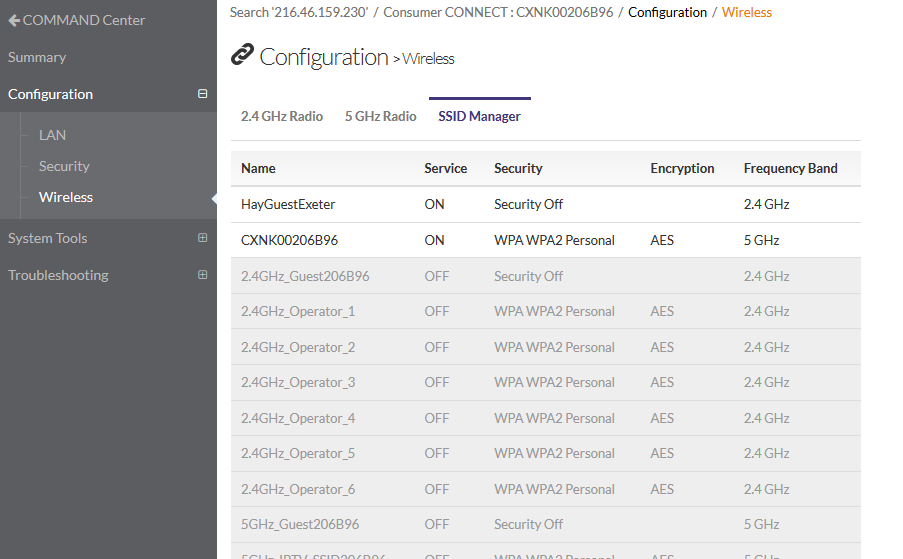
Form the Device Summary screen you can quickly get to the list of SSIDs by clicking the Wireless Security square. Another way to get there is to use the left menu by choosing Configuration and then Wireless. This brings you to the SSID Manager.
In the screenshot below we can see that there are two networks turned on. A 2.4GHz network called HayGuestExeter with no security and a 5GHz network that appears to be in the default state. By default a fresh 844E or 854G will broadcast a SSID that is the same as the devices FSAN number. In this case CXNK00206B96 is the FSAN number.
To make changes to a network click it once. A new editing screen will pop up.
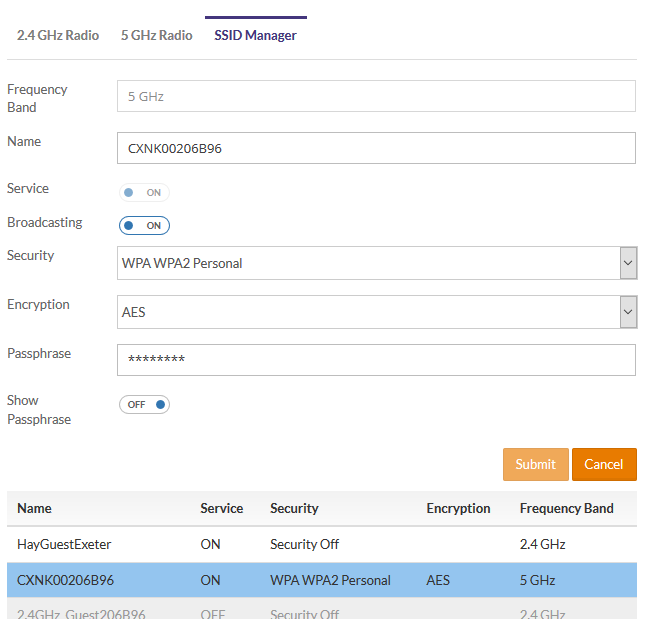
You can update the form here. Turn on Show Passphrase to set it. Once you click the Submit button watch out above the form as this is where a confirmation prompt shows up.
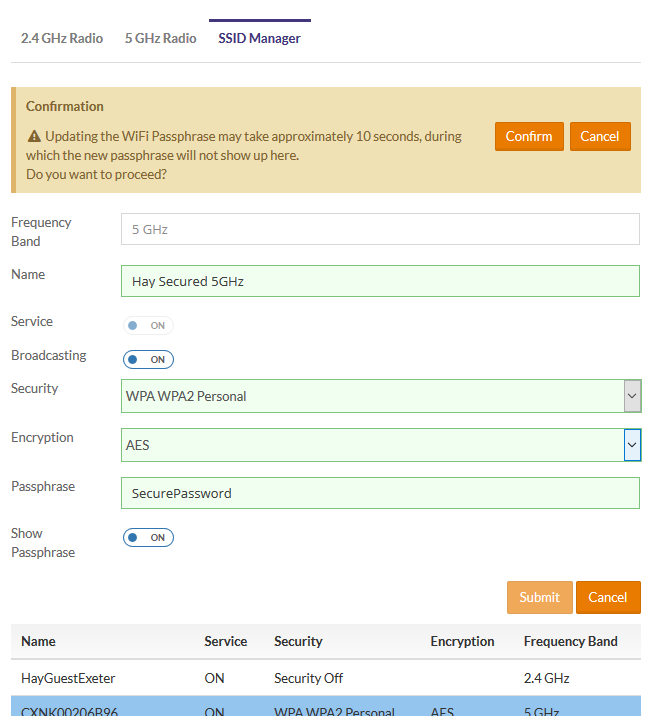
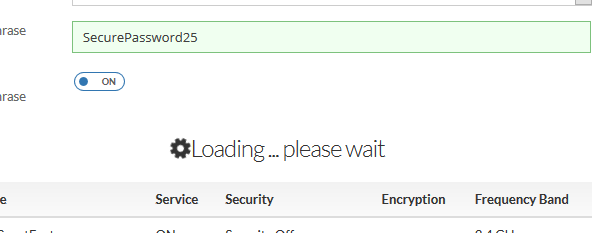
Click the Confirm butt and then watch out below the form as this is where the loading indicator shows up. To me it is a bit of a strange way to do it, but now you know what to expect.
Also on the Confirm box note the text that indicates the password will not display right way if you were to click the network again and click Show Passphrase to confirm the password saved. You have to wait 10-15 seconds before you click the network and click Show Passphrase to reveal your recently saved password.
You can turn on additional WiFi Networks if necessary in the SSID Manager. Generally by default at first setup we create a 2.4GHz and a 5GHz network with the same name and WPA2 security key. If a customer wants a 2.4GHz or 5GHz only network broadcasting you could do that for them by activating an additional network.
Adjust 2.4GHz or 5GHz Radio Settings
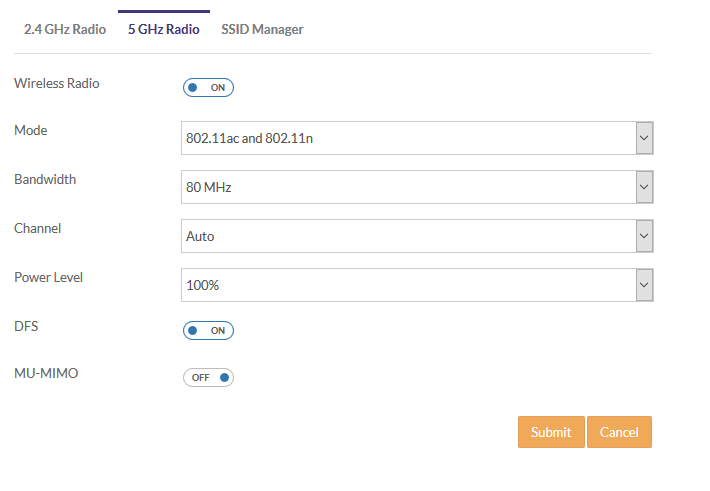
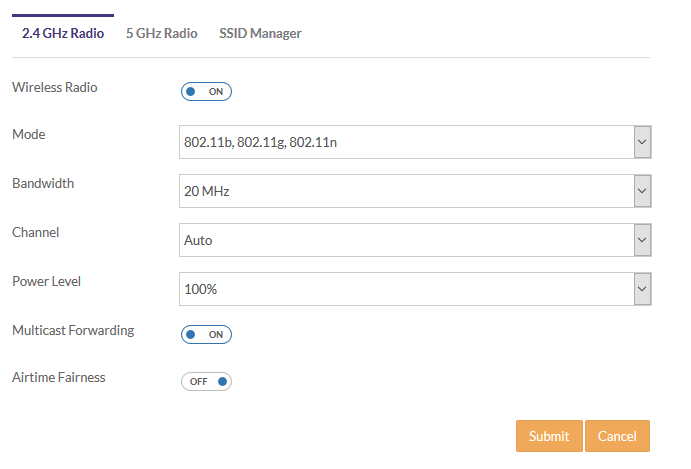
If you need to adjust radio settings such as Channel or Airtime Fairness you can use the two other Wireless configuration Tabs found under Confirure\Wireless. Besides the SSID Manager there is a 2.4GHz Radio and a 5GHz radio tab.
Generally these settings can all be left as default or auto however in certain circumstances w may want to manually set the channel. If the customer has many WiFi devices on the 2.4GHz network Airtime Fairness can be turned on and see if that helps.
Port Forwarding
Using Consumer Connect you are able to set up port forwarding for Calix 844E and 854G devices.
Go to Configure\Security and then click on the Port Forwarding tab.
Any existing port forwarding will display here in a list. Click the New button to add another entry. Under Application choose New Entry. The form below will show.
Enter a descriptive name for the entry and select the protocol and enter the remote port and remote port end you want to forward. Set the local port to whatever the customer specifies. You can select an already connected LAN Host or specify an IP address to forward to. Click Submit when you are done.
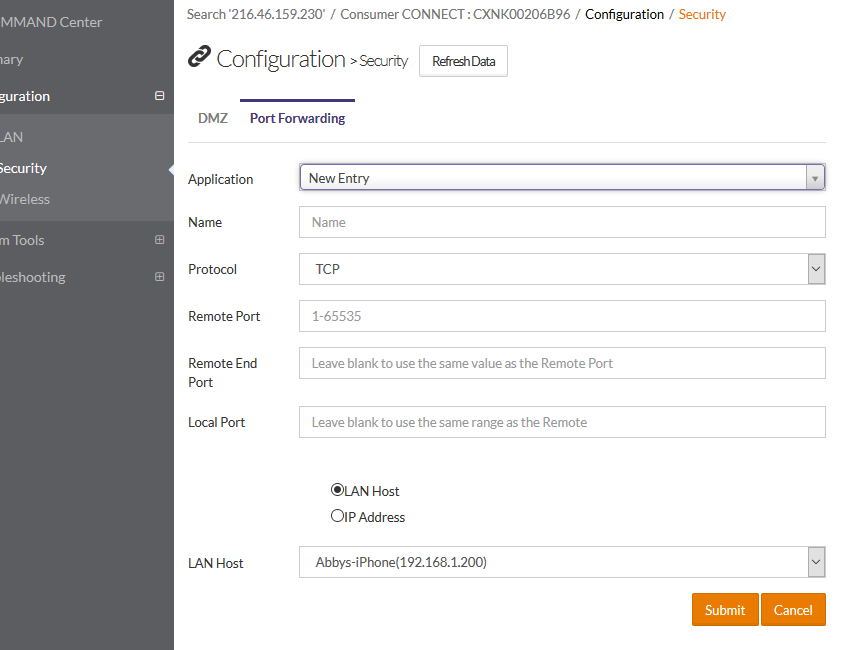
Once you submit the new entry will be listed. If you made a mistake simply delete the entry and re-enter it. Port forwarding will be live and active.
LAN DHCP Config
In rare circumstances we may receive a support call from an advanced user who requests we change the default IP addressing range.
If required make the changes and confirm things are working for the customer after devices are rebooted.
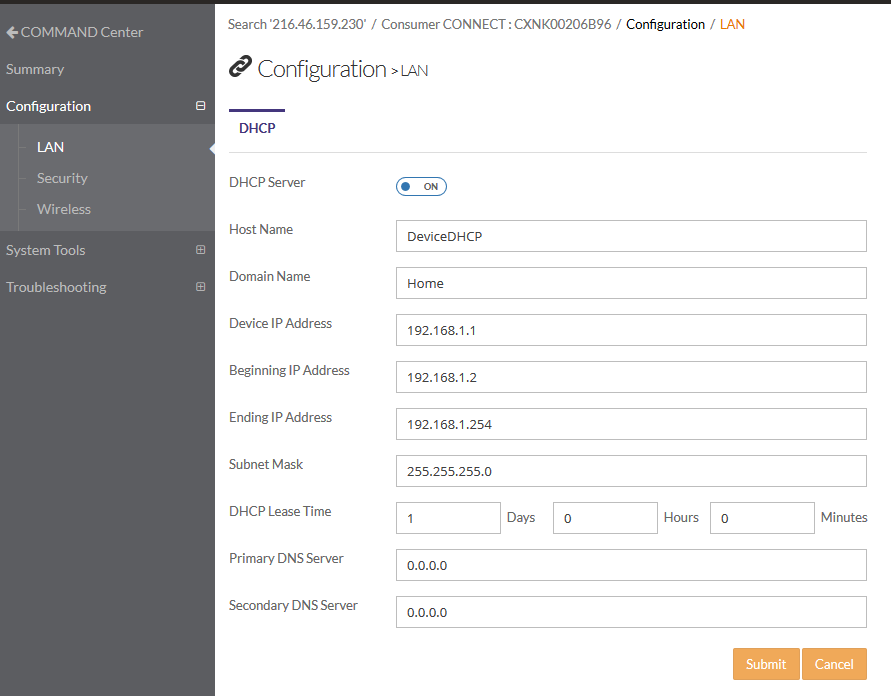
To be honest I’ve only had to do this twice so far.
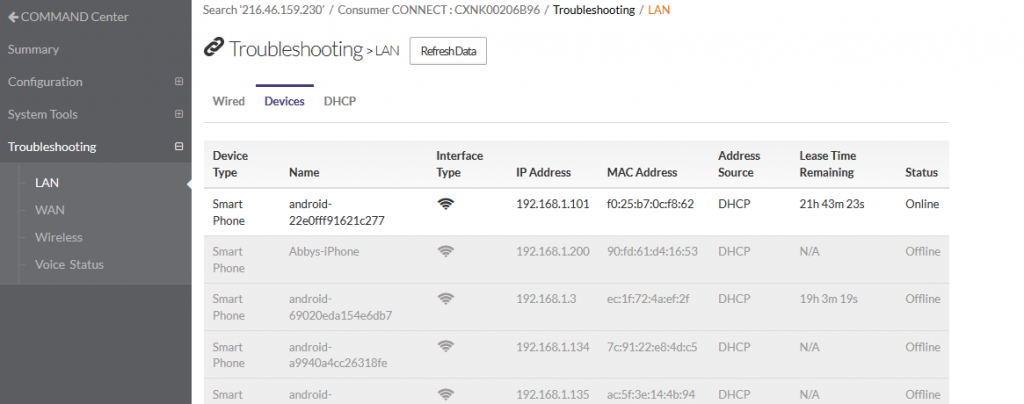
Troubleshooting LAN Devices
To view which LAN Devices are currently connect or have recently been connected go to Troubleshooting\LAN and click the Devices tab.
Can be useful if you need to know the IP address of a certain device such as an access point.
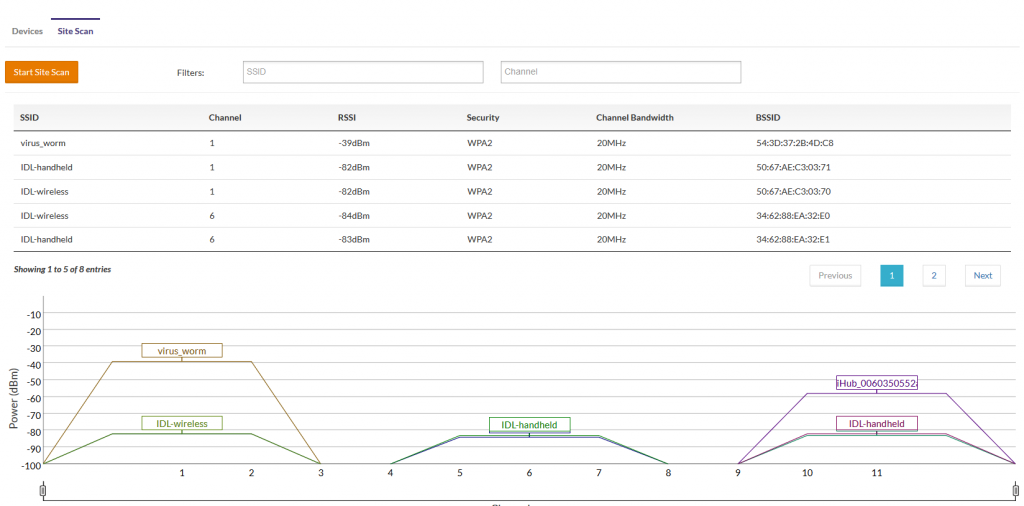
Troubleshooting WiFi Devices
You are able to view devices currently connected to both the 2.4GHz and 5GHz wireless networks. Details such as signal strength are listed and you can do a Site Scan if necessary to see if there are any strong interfering neighboring networks.
Go to Troubleshooting\Wireless.
Remember Tablets and Phones that are asleep, or phones with active cell calls, will show one bar. Click the WiFi Bars icon to show the signal in dBm. You can switch between the 2.4GHz Radio and 5GHz Radio tabs.

Click Site Scan and Start Site Scan to view any nearby WiFi networks. Here is an example of the results.
Troubleshooting WAN
Using Troubleshoot\WAN you can see the current WAN TCP/IP information as well as bytes transferred.
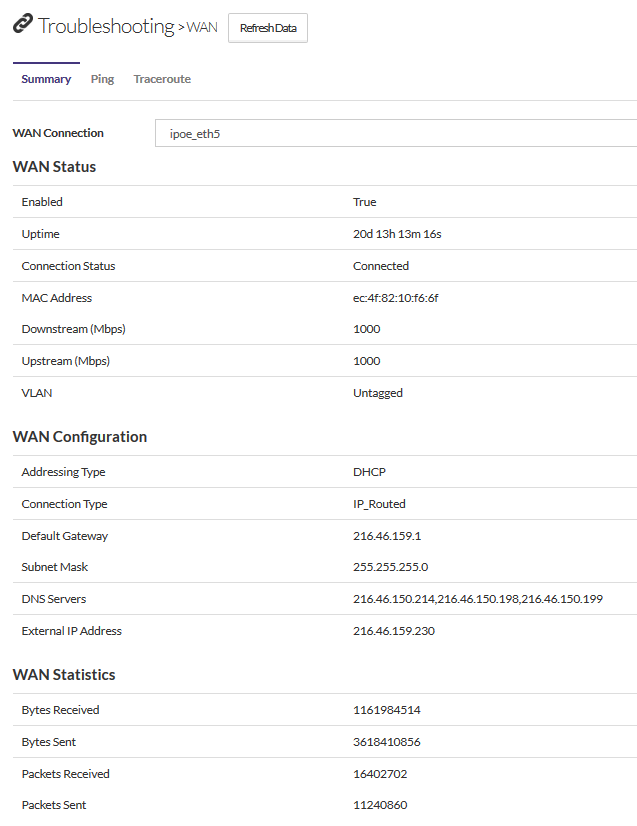
You can run ping tests from the Ping tab as well.
